I've seen a lot of nopCommerce forums users asking how they can use Entity Framework (EF) Code-First Migrations to customize nopCommerce, add new fields and entites to the core. I actually use a lot of EF Migrations myself when doing nopCommerce customization projects, and I must say it helps a lot in the development.
Today, I'll share with you how you can do that in nopCommerce project! I'll be using nopCommerce 3.20 as an example, but you can easily apply the concept to other vesions!
Setting Up EF Migrations in nopCommerce Solution
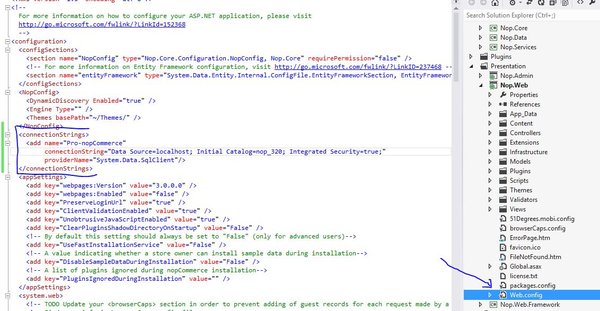
The first thing you want to do is to enable migrations in your nopCommerce solution. So fire up nopCommerce in Visual Studio, look at Nop.Web project, and open Web.config. You need to add a connection string to your development database. Note that adding the connection string in Web.config doesn't affect how nopCommerce works, since nopCommerce doesn't look for connection string in Web.config.
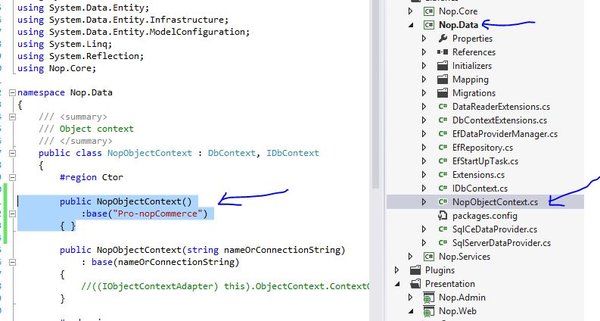
Then, open NopObjectContext.cs in Nop.Data. Add a new constructor that points to the name of the connection string that you've just added in previous step. NOTE: replace Pro-nopCommerce with the name of your connection string.
The next step is to actually enable migrations in the project. If you have not already done so, bring up Package Manager Console. In the "Default Project" drop-down list, select Nop.Data as the project. Please also make sure Nop.Web is selected as the StartUp Project. Now, enter the command "enable-migrations" in Package Manager Console, and hit Enter! Visual Studio will generate a file named "Configurations.cs"; you can safely ignore it, but you need to keep it.

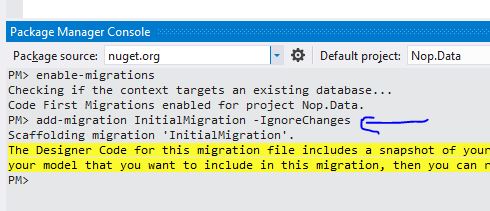
The last step in EF Migrations setup is done by entering the command "add-migration InitialMigration -IgnoreChanges" in Package Manager Console. "InitialMigration" (highligted yellow) is the name you want to give the the current migration, and the "IgnoreChanges" handle is to tell EF Migrations that you want to leave out the current database as-is: that means you want EF to ignore all the existing tables so that no script is generated for the existing tables.
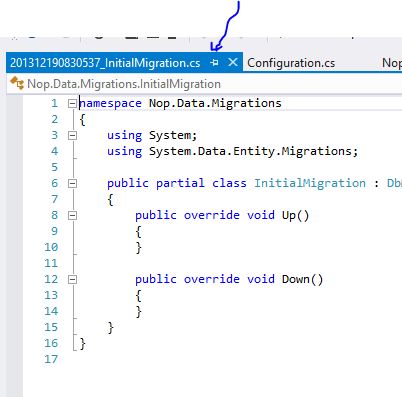
As a result, you'll see a new .cs file generated by Visual Studio that correspond to the migration - InitialMigration - you've just added. If you look at the file, it essentially is a blank file, due to the fact that we used the -IgnoreChanges handle in previous step.
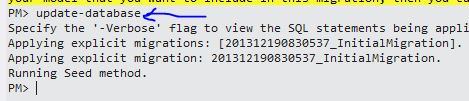
To actually save this migration over to the database, run the command "update-database" in Package Manager Console. Your database is now ready for actual EF Migration tasks!
Adding a Migration and Updating the Database
Now, suppose we want to link up Blog and Products, where a Product can have multiple BlogPost that talk about the Product itself. We'll need a one-to-many relationship between Product and BlogPost.
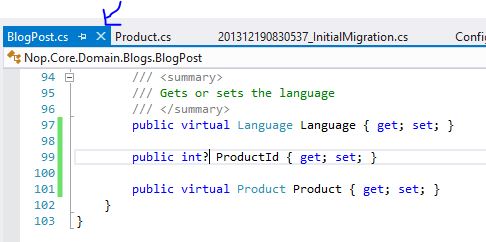
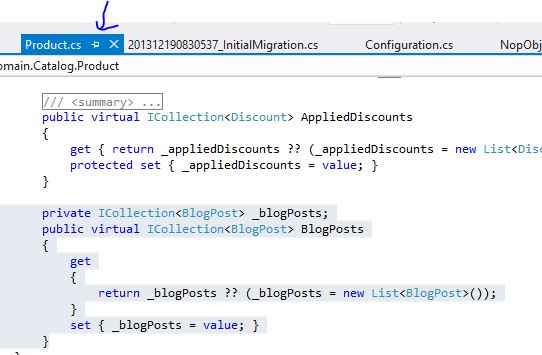
In essence, what we need is a new ProductId field in BlogPost, and a ICollection<BlogPost> property in Product. The following screenshot sums up the update we should add to both Product.cs and BlogPost.cs (in Nop.Core project).
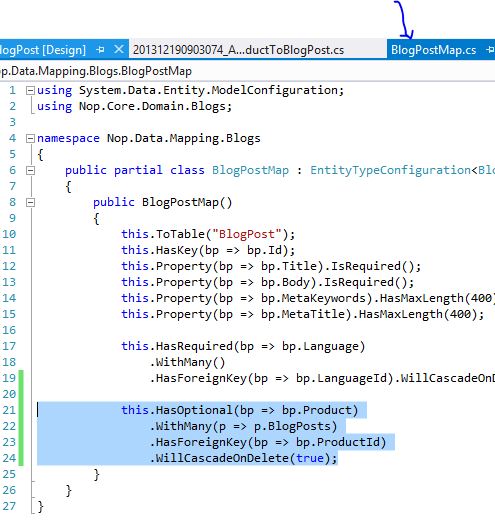
Now you have the properties ready on your domain model, you also need to setup the configuration and tell Entity Framework how you want to format the parameter, for example the relationship, and whether a field is optional/required. Open BlogPostMap.cs in Nop.Data, and enter the following lines, where we tell EF to that Product (or ProductId) is an optional property (meaning it can have NULL as value), and a Product can have many BlogPost, and to use ProductId as the foreign key between BlogPost and Product.
We now have enough information to instruct Entity Framework to generate the migration, so again, bring up Package Manager Console, and enter the command "add-migration AddProductToBlogPost".
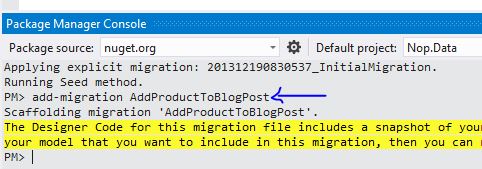
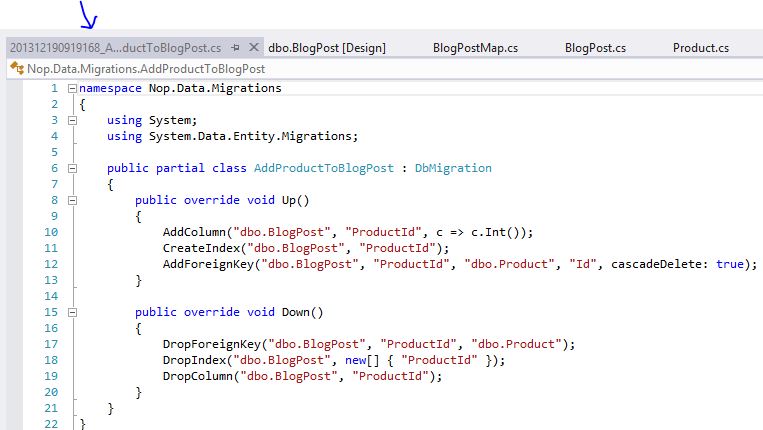
This command causes Visual Studio to generate a .cs file that looks like the following:
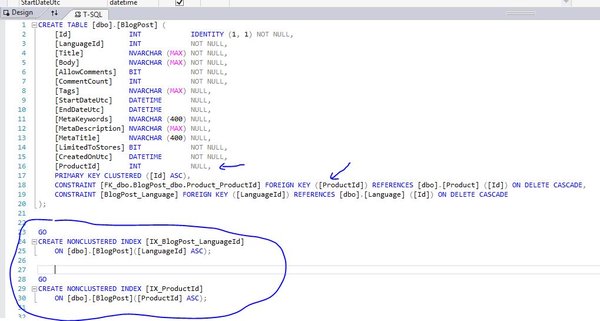
To actually generate the SQL script and update the database, run again the command "update-database" in Package Manager Console. Now, to verify that the database is updated correctly, open up BlogPost table in the database, and check that the new field, foreign key and etc are indeed added.
Conclusion
Entity Framework Code-first Migration can be a very handy tool if you customize nopCommerce a lot. Like this you don't need to touch the database when you want to add new fields, tables and etc to the database. Everything can be done from the code!
Learn up the technique, and have fun coding!